Hello again readers, and welcome back! Today's blog post is going to cover the process that I personally use to rearrange and correlate RDP Bitmap Cache data in Photoshop. Yes, I am aware that some of you know me primarily for my Photoshop productions in presentations and logos (and HDR photography, a hobby I do not spend nearly enough time on!), but the time has finally come when I can utilize Photoshop as part of my forensic analysis process!
First off, if you are not aware, when a user establishes an RDP (Remote Desktop Protocol) connection, there are files that are typically saved on the user’s system (the source host). These files have changed in name and in format over the years, but commonly are stored under the path “%USERPROFILE%\AppData\Local\Microsoft\Terminal Server Client\Cache\”. You will usually have a file with a .bmc extension, and on Windows 7 and newer systems, you will also likely see files that are named “cache000.bin” (these are incrementally numbered starting at 0000). This was introduced on Windows 7 and should be searchable by the naming convention of “cache{4-digits}.bin”. Both files contain what are essentially small chunks of screenshots that are saved of the remote desktop. The most reliable tool that I have found to parse this data is bmc-tools, which can be downloaded from https://github.com/ANSSI-FR/bmc-tools. The process for extracting the data is straight-forward, you point the script at a cache####.bin file, and extract it to a folder of your choice. Once done, you end up with a folder filled with small bitmap images.
Now begins the phun part! The bitmaps will need to be rearranged manually to reconstruct the screenshot as best as is possible (like a jigsaw for forensic enthusiasts). This is not an exact science, and it relies on educated best-guess in many cases. While this could be a more manual and tedious process, Adobe Photoshop can be used to automate the import of the files. Then you can rebuild the item(s) as you see fit!
First, view the contents of the folder in Windows Explorer, or Adobe Bridge (included in Adobe Photoshop CC bundle) for Mac users. I found Preview does not work, it does not render the bitmaps properly. Rather than spending valuable time trying to figure out why that is, I just used Bridge.
Next select the bitmaps of the activity you’d like to reconstruct, go into Photoshop, and choose "File-Scripts-Load Files into Stack...":
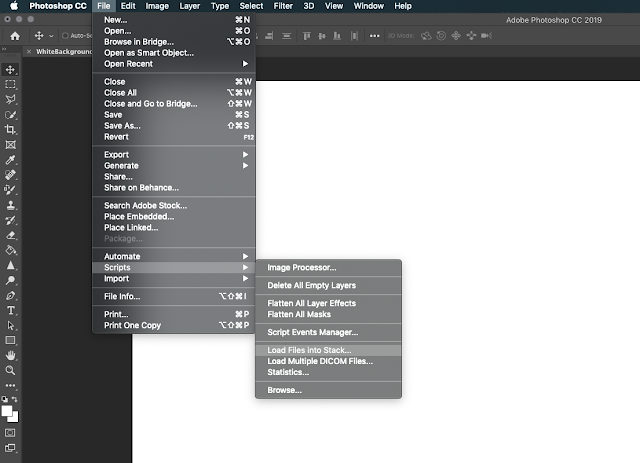 |
| Photoshop fortunately has a script to import multiple files into one workspace (it is called a "Stack") |
|
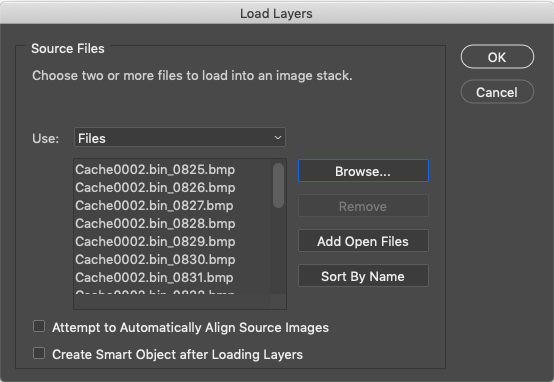
This will allow you to choose multiple files, to import into Photoshop all at once. You will be presented with a “Load Layers” option. Select the “Browse” button, and then browse to the folder that contains the bitmap files you wish to load:
 |
| The "Load Layers" dialogue box. In order to choose the file(s) you want to open, click "Browse..." |
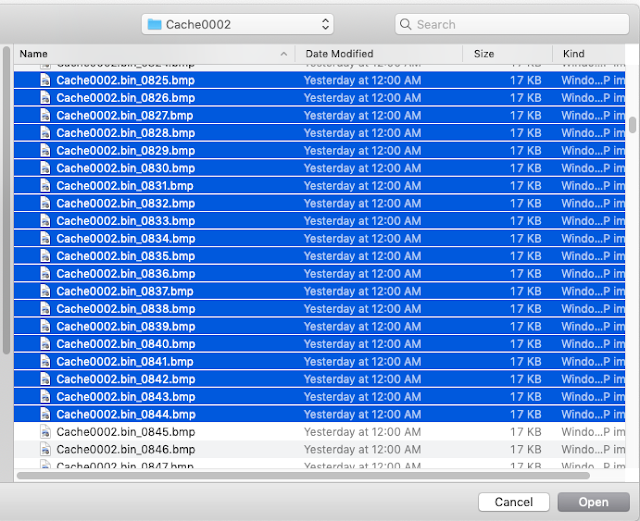 |
| Choose the files that you wish to load |
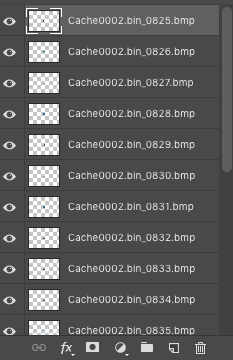
Once you’ve selected the bitmap files, you will see the “Load Layers” box is populated with those files:
 |
| After selecting the files, the "Load Layers" box will now be populated |
Click "OK", and the importing process will begin. This might take a little while depending on the number of images you selected. Once the import is complete, a new workspace with each file being loaded in as a layer will be created. Highlight all of the layers (scroll to the top, and click on the top entry, and scroll to the bottom and click on the bottom entry holding "Shift"), then copy the layers. You can now paste the results into your original workspace, and you can rearrange and rename the layers with whatever you'd like in an effort to reconstruct the activity:
|
 |
| Select all of the layers and copy them |
|
 |
| Paste the layers into your original workspace, and rearrange them to rebuild the activity! |
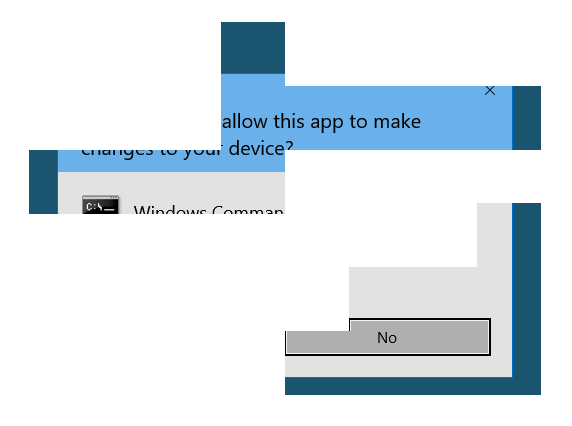 |
| This is an example of the partial output you can recover from rearranging the files to rebuild a window |
|
I truly hope that this small tutorial helps with your process and workload should you find yourself rebuilding RDP session activity. For readers who do not currently own Photoshop, Adobe has a very inexpensive offering of the Adobe Creative Cloud (CC) for a personal license under the Photography plan, which is $9.99 a month. It is a great deal and one that I have used for my photography hobby for many years. And now on forensic analysis cases that involve RDP bitmap reconstruction!


Nice Post aonderful
ReplyDelete